

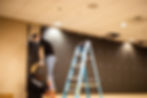
Recently, our TECH TEAM had the opportunity to install two new LED walls at a government facility. It was our first time working with the Samsung Directview LED 1.5 mm and associated Peerless wall mounting system and, although we had a few hiccups, all-in-all, it went reasonably smooth. We thought this article could provide some insight for those who install this system and shed light on these products’ manufacturers and how helpful they are when you run into a snafu. We’ve also taken the time to interview the leading technicians on-site, and you can see their responses below!

This video wall system was undoubtedly unique and had some beautiful features.
The system we were working with was impressive. The Samsung wall is constructed by rows and columns of cabinets that each host a set of modules. Each of the LED modules can be minutely adjusted to have a seamless video wall as a final product. Use the magnetic tool provided, and you can unlock one module, pop it out, and make adjustments. Seamless is no overestimation either, as the tolerance of getting everything to settle in place ends up being somewhere in the ballpark of about a millimeter and a half to two millimeters - we’re not joking. It’s an insane system. To get this system to be level and seamless is no easy feat, but the Peerless wall mounting system certainly helped us get it installed.

With a little help from our friends at Peerless, we were taught how to install their mounting system effectively.
Peerless was kind enough to send out a representative to help us install the video walls for success. For the mount to do its job, he specified that the order you set up the mountain is of paramount importance. To start, we first installed the top horizontal extrusion pieces. We assured the tops were level with a laser-level, then attached the outside (right and left) proprietary verticals, and followed that with making sure the bottom horizontal extrusion was level after attachment. This gives a framework to mount the multiple vertical support structures for the cabinets. Once the framework is installed on the wall, use a string line to calibrate the top and bottom horizontal extrusions’ depth and overall alignment. Assuring that the framework is completely plumb utilizing the string line is of the utmost importance when preparing the mount for cabinet installation. At this point, we used the Peerless provided spacer tool to make sure that the verticals are equally spaced to fit the cabinets precisely.
Once we had the mount set up, it was time to rock and roll with the Samsung cabinets’ installation. We started at the bottom right of the display and methodically worked our way to the left. The system design created an unusual cabling/connection pattern. It is slightly abnormal - you don’t just daisy chain the panels together left to right or top to bottom. Instead, it’s an odd pattern that differentiates between power and video feed. Each column’s electrical power cabling follows a path from left to right on the bottom row and then feeds bottom to the top of each cabinet above that. The video cabling is even weirder - as you would start at one cabinet, skip over the cabinet next to it, and eventually work your way back to it. We are sure that the explanation of what we were working with is confusing, so imagine the brainpower it took to stay on top of what we were plugging in. It took a lot of focus.
Sometimes things don't go as planned, and you have to accept the loss and work to win the next round.
Although we did our best as we were installing each cabinet, we got our wires crossed a couple of times, literally. This led to the unfortunate result of us having taken cabinets in and out of the mount: the more you remove and replace the cabinets, the higher the chance that the mountain can shift and cause the cabinets to have a more challenging time falling into place. As we worked our way to the second column, we started descending into an issue of the modules buckling outward due to the cabinet being too tight. That minimal tolerance mentioned above was beginning to create a problem. It pains us to say it, but once we were almost to the third row - it all had to be taken out.

Peerless is a company that cares about its customers; they were there for us when we needed it.
This is where Peerless proved that they are an excellent company whose relationship doesn’t evaporate after you’ve purchased their product. We reached out to the representative who had assisted in the initial mounting, and he was quick to help. Since it was a travel day for him and he would be stuck on an airplane most of the day, he helped us get in touch with a Peerless engineer. Once we reached out to the engineer, he quickly helped and called us back with a solution when our lunch was over.

Rather than working our way row by row, he suggested that we work from the middle column. Got to say, it worked like a charm. Although the removal of cabinets caused a bit of shifting within the first mount, we were still able to install every cabinet by working bottom to top effectively and then outwards. Once we moved to the second wall, we nearly cut our install time in half! If you ever work with one of these systems, take it from us and work column to column rather than row to row - it’ll make a huge difference!
It took some hard work and some growing pains, but we got it done!
Although it is a simple solution, there you have it - the impact of adjusting the workflow from row-based to column-based was monumental. Once you get your mount up and are ready to start installing the cabinets, we hope our advice will save you working hours on-site! We look forward to our next installation of this system, as we will be ready to tackle it in no time!

We spoke to Paul and Charles and documented their thoughts on the installation process.
What was the most challenging aspect of setting up this mount?
Charles: The aspect was more or less discovered afterward, but I think the most challenging part was the fact that we were mounting it to a wall that had a soft layer of sheetrock between the mount and wall. As discussed in the article, the mounting system had such a tight tolerance that any give between the support and the border could lead to issues. We worked around this, though.
Paul: I think the most challenging part was not a typical daisy chain; super easy to get the wires crossed up. Keep double-checking your work. It’s not fun taking the panels back down to re-wire. Stay on top of making sure that the data and power are daisy-chained per spec.
What was the best advice you received during the mounting process?
Paul: Setting the cabinets into columns. That was the best advice. What do you think, Charles?
Charles: Yeah, I’d have to agree with that. Peerless change in instructions to go from mounting in a left-to-right fashion, bottom to top, then to the center column working out alleviated our issues.
If you have to install this system again, what will make the process more comfortable in the future?
Charles: The knowledge that we acquired from the first installation. We’d do the same thing but better.
Paul: Knowing that the little pixels within the module are easy to break on the cabinets. Take good care of them and be gentle.
What was your biggest challenge with this installation?
Charles: With the Samsung cabinets it was the proprietary DisplayPort plugs. After installing them, they could come loose quickly and did not come labeled. We pre-label the ins and outs - it would help to have some indication pre-wrapped with a color code or make a female end on one side and a male back on the other. Something to make it easier to know what is an in and what’s an out.
Paul: I can agree with Charles on that, but I would also say that when we ran into the cabinets’ problem not fitting correctly, we didn’t have the solution right away. That made it very frustrating burning working hours on site.
What is your favorite feature of the Samsung cabinets?
Charles: I like the fact that these LED video walls have a great place in a classroom setting because viewing angles on them, you know if you were sitting in a classroom with standard LCD, the color might be washed out depending on your viewing angle, but with these Samsung LED video walls I’m pretty sure that there is an infinite viewing angle as long as you can see the front of the display.
Paul: I think the ability to take the modules on and off with that magnetic tool is pretty cool. Down the road, if you need to replace one, all you have to do is pop one-off, install a new one, and then reset the system, and you’d be good to go.
Any advice for another TECH TEAM that might come across this installation?
Charles: I would say that the mount is the majority of the work. If you put that horse up sloppy, or skip steps, or ignore the tolerances, it is just going to come back to bite you in the butt. My advice to another tech would be to take putting the mount up seriously. Don’t cut corners, be very precise with your work, double and triple-check everything, measure, do it, measure again, and probably help them out greatly on those final days when they put the cabinets on and go to mount everything and what-not.
Paul: My advice would be as you're installing the cabinets, don’t force them in. They should be able to sit nicely and smoothly. They may have a little resistance, but it isn’t a good sign if you have to push on them. If it (the cabinet) is doing that, you need to loosen up the vertical a little to make the vertical into place, retighten it, and keep moving. Like the cabinet, as you have to force it, you can adjust the vertical, top, and bottom, so the cabinet doesn’t have to be moved in.